
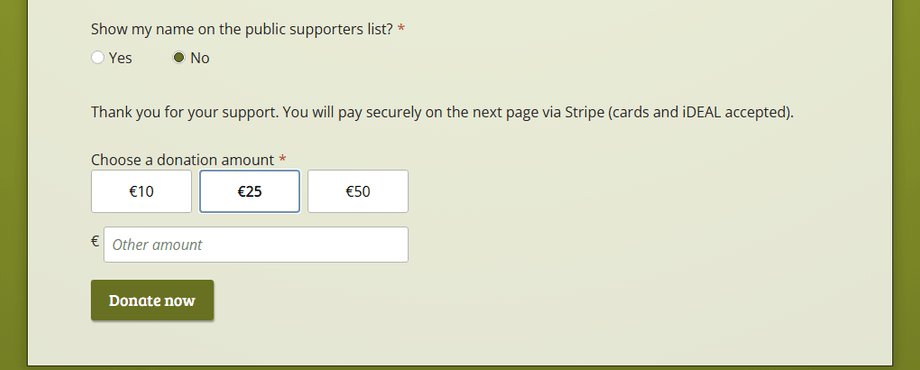
When you run a club, charity, school committee or small shop, collecting money alongside a registration or order often creates extra work. Chasing bank transfers after someone signs up for an event or orders goods takes time. With payment forms in FormFinch, people fill in their details and pay right away via iDEAL or credit card.
When a payment form helps
Adding a payment step helps whenever you want one payment tied directly to a form submission. A club or school committee can collect event fees when people enrol. A charity can accept contributions on a donation form, and a small shop can take payment as soon as a customer places an order.
The Payment component in FormFinch takes a one-time payment on a form. You cannot use it for recurring payments or subscriptions on forms. The money goes straight to your own Stripe account through Stripe Connect Express. FormFinch charges 0% platform fee, while Stripe’s own processing fees still apply. Respondents pay on a Stripe Checkout page, so card details are handled by Stripe, not by FormFinch.
Connect your Stripe account
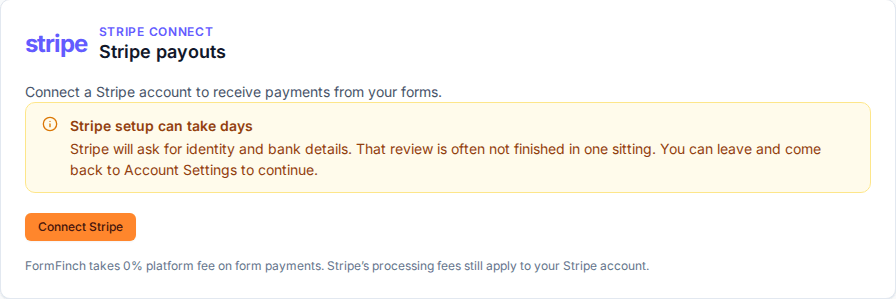
Before taking payments, connect your Stripe account to FormFinch:
- Open Account Settings and go to the Stripe payouts card.
- Click Connect Stripe.
- Open the link in the confirmation email from FormFinch within 30 minutes and complete the setup with Stripe.
- Back on Account Settings, click Finish setup if the card still asks for it.
Stripe’s review can take days, and you can finish the setup later if needed. Once connected, click Open Express Dashboard to open your Stripe Express Dashboard.
Add the Payment component to your form
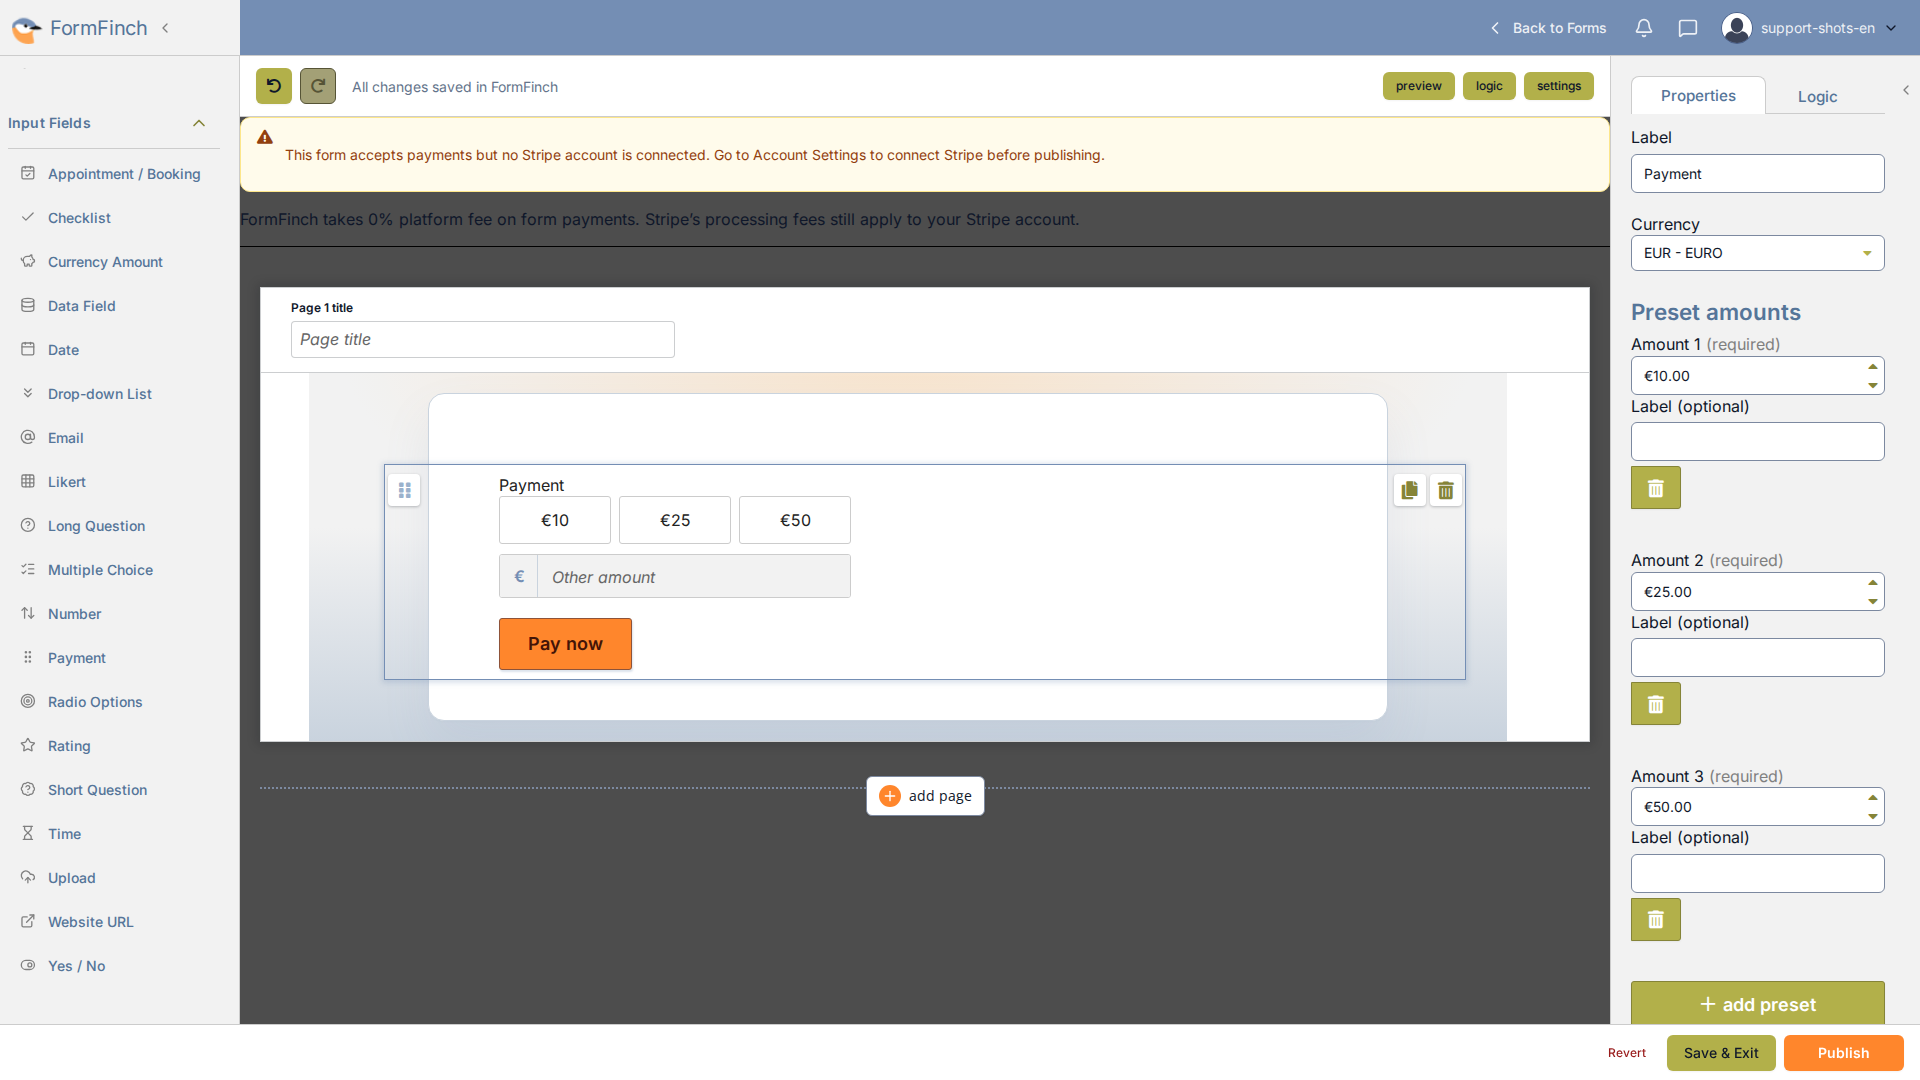
In the form designer, drag Payment from Input Fields onto the canvas. A form can have one Payment component, placed on the last page. It takes the place of the submit button and cannot be combined with the Currency Amount component. By default, it starts with preset amounts of 10, 25 and 50 in EUR, a custom amount field and the button Pay now.
You can configure these properties on the Payment component:
- Currency: Choose a currency that your Stripe account accepts.
- Preset amounts: Click Add preset to add fixed options. An optional Label replaces the amount on that button, such as “Home box €28”.
- Allow custom amount: Adds an Other amount field for respondents to enter their own figure.
- Default amount: Sets which amount is selected first.
- Min. amount and Max. amount: Limit the lowest and highest allowed payment.
- Pay button label: Customise the text on the Pay now button.
What your respondents see
Whether someone uses a computer or a phone, the process works the same way. Respondents pick an amount, click the pay button and pay on Stripe Checkout. Stripe Checkout shows the payment methods enabled in your Stripe account, such as iDEAL and credit card. Cancelling in Checkout returns them to the form.
After paying, respondents land on a FormFinch page showing the payment status: received, being processed, failed or canceled. When Stripe provides a receipt, the page links to it.
Payments in your submissions
A submission appears in FormFinch once its payment is paid or still processing. When viewing submissions, the submissions overview shows a Payment column with the amount and a status badge: Paid, Processing, Failed or Canceled.
Open a submission to see Payment, Amount and Reference (the Stripe payment ID) in the detail panel. For your bookkeeping, exporting submissions lets you download all entries to Excel or CSV.
Test first, then go live
In the designer preview, Stripe Checkout never opens. Publish your form first when you want to test paying.
On the Free plan, payments run in Stripe test mode. The published form shows a Test mode banner and no real money is charged. Live charges need a paid plan in FormFinch.
To start from a ready-made layout, pick the donation form template or the product order form template. Both templates already include a Payment component on the last page.